Preparing for a Project
Getting started with stained glass painting* is easy. Some of the basic supplies you will need are stained glass paint of various shades along with some whites as well as clear or frost paints. You will also need some liquid leading. There are several available including Black/Pewter, Silver and Gold. Black leading seems to work best at providing a clear outline for objects.
Several other things you will need are Leading Blanks, toothpicks, pin, and an object such as a spoon or any object with some length and weight for tapping the bottom of lead sheets to rid the paint of air bubbles.
First choose a pattern for your glass art. There are many available for purchase but you can also draw your own or use a child’s coloring book.
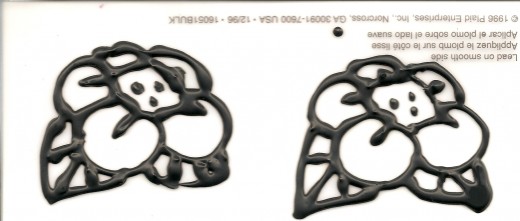
Place the pattern under “leading blank”* – the “leading blank” is a transparent piece of plastic which will allow you to create your painting and then remove it so it may be placed on a glass window, lamp shade, etc.
Using Liquid Leading
Liquid Leading* can be a little tricky to use successfully. Often it is difficult to squeeze from the bottle due to the thick nature of the leading. Heating the bottle in a pan of water first is helpful and will make the substance thinner and easier to draw with. Be sure to wrap a towel around the bottle to begin using it.
As you proceed, touch the tip of the leading bottle to the plastic page. This is called anchoring the leading. As you move through the drawing anchor the leading at the end of each line. It is sometimes helpful to practice creating a few lines before beginning a project. Remember, your leading lines can be peeled off of the leading sheet once it dries allowing you to reuse the leading sheets.
As you create your project, be certain that all lines are connected where paint will be applied as your leading lines form the borders of the pond of liquid paint you will apply. If lines are not connected completely, the paint will flow out of the area.
Once the leading is applied, it will take approximately 8-10 hours for the leading to dry. Use a razor blade or craft knife to cut off any leading that is unwanted.
Applying the Glass Paint
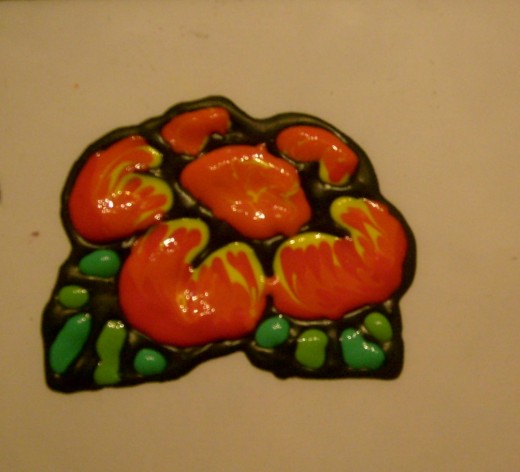
Choose the colors you feel will look best for your object. Paint appears creamy before it dries. Once dry it will become translucent and will also appear darker than the color appears in the bottle.
Apply the paint by squeezing it directly from the bottle, filling the pond like areas that you created with the liquid leading. At first you may want to choose just one color per pond like area. After some experience with the paint you may want to use two or more colors in such a way that you can pull the colors together using a toothpick into a swirling or stripping design creating a variegated impression.
Removing Bubbles and Checking for Empty Paint Areas
One you’ve applied the paint tap briskly the underneath side of the leading sheet with a weighted object such as a spoon to cause air bubbles to rise to the top of the paint and burst. You probably won’t get all bubbles to burst. Sometimes a clean pin can be used to burst a bubble. You may also use a toothpick to move the bubble onto the black leading and out of view. Any glass paint that dries on the black leading is almost invisible so don’t sweat it if some of it rises onto the leading. You may wish to do this in stages so paint doesn’t dry before you remove bubbles and check for unapplied paint areas.
To check for un-applied paint areas, hold the leading sheet containing your painted object up to a strong light and use a toothpick to move the paint gently towards any empty paint areas where the paint needs to join the leading. This will create a clean solid finish of painted objects.
Wait another 8 hours or so for paint to dry completely before gently removing the art objects from the leading sheets. You can apply the objects directly to a window or other glass project.

And Finally . . .
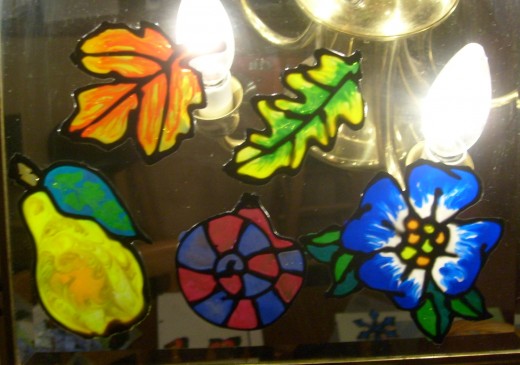
The sky is the limit! Once you've grasped a few small projects you can let your imagination go wild with ideas for glass projects. Whether you've drawn a pattern yourself or found patterns in coloring books or other book, you can create a unique, beautiful home!
No comments:
Post a Comment