Saturday, September 22, 2018

Introduction to Creating Faux Stained Glass Projects

Preparing for a Project


Getting started with stained glass painting* is easy. Some of the basic supplies you will need are stained glass paint of various shades along with some whites as well as clear or frost paints. You will also need some liquid leading. There are several available including Black/Pewter, Silver and Gold. Black leading seems to work best at providing a clear outline for objects.
Several other things you will need are Leading Blanks, toothpicks, pin, and an object such as a spoon or any object with some length and weight for tapping the bottom of lead sheets to rid the paint of air bubbles.

First choose a pattern for your glass art. There are many available for purchase but you can also draw your own or use a child’s coloring book.

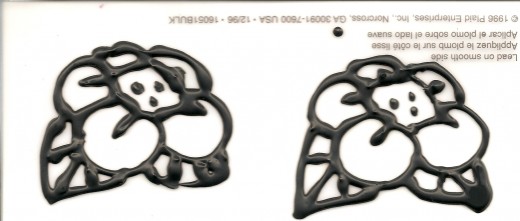
Place the pattern under “leading blank”* – the “leading blank” is a transparent piece of plastic which will allow you to create your painting and then remove it so it may be placed on a glass window, lamp shade, etc.

Using Liquid Leading

Liquid Leading* can be a little tricky to use successfully. Often it is difficult to squeeze from the bottle due to the thick nature of the leading. Heating the bottle in a pan of water first is helpful and will make the substance thinner and easier to draw with. Be sure to wrap a towel around the bottle to begin using it.
As you proceed, touch the tip of the leading bottle to the plastic page. This is called anchoring the leading. As you move through the drawing anchor the leading at the end of each line. It is sometimes helpful to practice creating a few lines before beginning a project. Remember, your leading lines can be peeled off of the leading sheet once it dries allowing you to reuse the leading sheets.
As you create your project, be certain that all lines are connected where paint will be applied as your leading lines form the borders of the pond of liquid paint you will apply. If lines are not connected completely, the paint will flow out of the area.
Once the leading is applied, it will take approximately 8-10 hours for the leading to dry. Use a razor blade or craft knife to cut off any leading that is unwanted.
Applying the Glass Paint

Choose the colors you feel will look best for your object. Paint appears creamy before it dries. Once dry it will become translucent and will also appear darker than the color appears in the bottle.
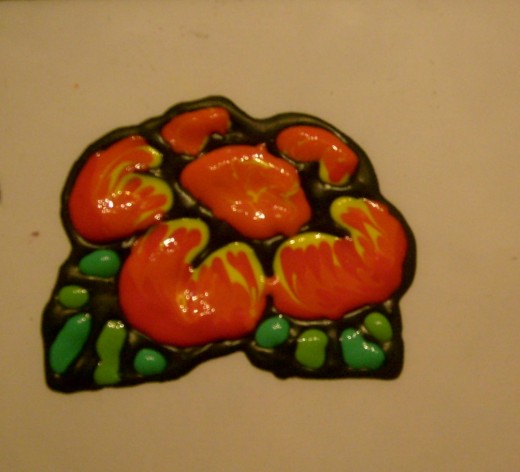
Apply the paint by squeezing it directly from the bottle, filling the pond like areas that you created with the liquid leading. At first you may want to choose just one color per pond like area. After some experience with the paint you may want to use two or more colors in such a way that you can pull the colors together using a toothpick into a swirling or stripping design creating a variegated impression.
Removing Bubbles and Checking for Empty Paint Areas

One you’ve applied the paint tap briskly the underneath side of the leading sheet with a weighted object such as a spoon to cause air bubbles to rise to the top of the paint and burst. You probably won’t get all bubbles to burst. Sometimes a clean pin can be used to burst a bubble. You may also use a toothpick to move the bubble onto the black leading and out of view. Any glass paint that dries on the black leading is almost invisible so don’t sweat it if some of it rises onto the leading. You may wish to do this in stages so paint doesn’t dry before you remove bubbles and check for unapplied paint areas.
To check for un-applied paint areas, hold the leading sheet containing your painted object up to a strong light and use a toothpick to move the paint gently towards any empty paint areas where the paint needs to join the leading. This will create a clean solid finish of painted objects.
Wait another 8 hours or so for paint to dry completely before gently removing the art objects from the leading sheets. You can apply the objects directly to a window or other glass project.
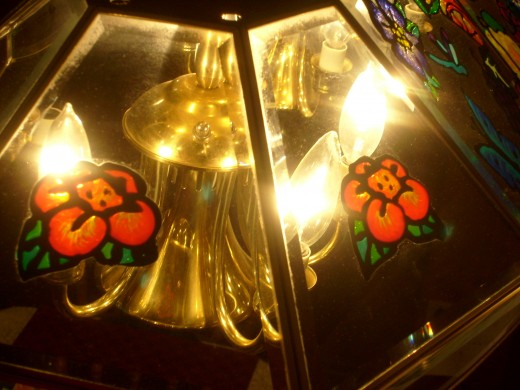
Once the paint dries you can peel the project off the lead sheets and place it on any glass surface!
These flowers dress up the dining room table light.

And Finally . . .

The sky is the limit! Once you've grasped a few small projects you can let your imagination go wild with ideas for glass projects. Whether you've drawn a pattern yourself or found patterns in coloring books or other book, you can create a unique, beautiful home!

How to Get a Frosted Look on Glass

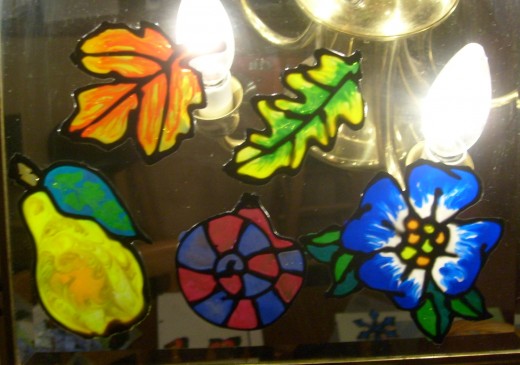
For more of a frosted look, you can work with Gallery Glass etching paint for an icy look.
  • It can be applied while painting or be dabbed on with a brush.
  • You can also use it with a toothpick to create different background patterns as well.
Note: When using the etching paint, know it is more permanent than regular glass paint. Applying it directly to a window can be hard to get off if you decide to change it later.

Can I Create Different Leading Lines?

Want to create straight lines with leading, but lack the steady hand you need? There are ready-made leadings so you can create perfect leading lines for windows. It comes in a roll or a package of straight pre-cut lines. By simply cutting what you need and adhering it to your surface, you will have the straight line you desire.
Wish you could match the color scheme of your painting a little bit more? There are also liquid leadings of gold and silver you can use to outline your creation.

Source

How to Make Smaller Leading Width Sizes

Though it’s probably best to have a large drawing in mind when doing a project, a thinner leading may be required at times to create a smaller image, such as one of a bird or butterfly.
  • One method of making smaller leading lines is by using tape. Applying tape such as artist's tape to the tip of your faux leading allows you to adjust it to the size of your liking.
  • Another method you can use is to tape icing piping tips (typically used for baking) onto the tip of the leading bottle.
Both options can require a little time to apply to the tip of the bottle but are worth the results.
  1. After each use, make sure you clear out what has been left behind inside of the icing piping tips. This can usually be handled by running hot water inside of the tip and scraping out the excess with a toothpick. Let it thoroughly dry out before each use.
  2. A simpler method could also be by letting the leading stay within the tips overnight. Once the leading inside has completely dried, just take your toothpick and scrape down the sides of the tip. The hardened leading can easily be pulled out. Tip sizes to consider are the 2 and 1.
Note: There are actual tips called Micro Tips for the liquid leading bottles, but for some reason, they have been discontinued.

How to Get Rid of Bubbles in a Faux Stained Glass Painting

If you notice bubbles while painting on your sheet protector surface, tap underneath the section with the end of a nutpick or spoon handle and watch them pop!
If you're painting directly on glass, tapping underneath will not work. You will have to take a straight pin and pop the bubbles individually. The main issues are big bubbles showing up on either surface. Pop as many of the tiny ones as you possibly can, but the big ones are definitely the ones that can mess up your painting. With practice, you will get used to popping bubbles.

Source

Helpful Websites and Ideas

  • Plaid
  • Gallery Glass Class
  • Painted Faux Stained Glass Project: Cardinal and Magnolia

Enjoy Trying This Fun Craft Project!

It’s not a difficult form of painting, especially with its removable and reusable qualities. In fact, I find it downright easy and fun! You can beautify home furnishings such as windows, vases, or mirrors. Faux stained painting can also add privacy to windows by preventing outside lookers from seeing in. With some practice, we’ll be professionally faux stained-glass painting in no time.
This hub was inspired by Mary615 and her awesome introductory article on the subject. Had it not been for her, I wouldn’t have found this creative outlet. Check out her wonderful tutorial on making faux stained glass look real! Thanks, Mary, I've started and, now, I can't stop!

Painting on Glass, Plexi-Glass, or Mirrors

This process can also be used directly on glass to make hanging artwork pieces.
  • For vertical use on windows, it’s as simple as painting on a flat surface. You may have to hold the tip of a color bottle at a slight angle, but it still works the same. Just be aware of how thinly you apply the paint.
  • Gravity can play a role in the paint sliding downward, making it color heavy near the bottom of each painted section. With careful application, you should be fine. Just practice before you start your masterpiece.

What Can I Do for a Background?

If you find that your painting is surrounded by nothing but plain space, there are plenty of techniques that can be used for various looks for backgrounds. Most of them can be made up using your own creativity. Backgrounds can be created using any color, but the main colors used to create a “hard to see through” appearance are Crystal Clear (my fave), Hologram Shimmer (has bits of glitter), and Clear Frost.
Here are a few videos to give you a few examples:

1. Swirl Background Technique

2. Dotting Technique

3. Pebble Technique


The Difference in Pebbling

I did this image with split of two different backgrounds.
Dragonfly with etched painted edge.